|
Mastering the MaisonTable of ContentsSingles AdviceIn Maison singles battles, your team consists of just three Pokémon. Teams typically are built in one of two ways: 1) cripple the opponent's lead, taking advantage of the AI's unwillingness to switch out in most circumstances, and set up a sweeper, or 2) build a goodstuff / synergy team of three powerful Pokémon that are reliable and cover each other's weaknesses. While you can certainly try other strategies, such as weather and Trick Room, it can be difficult to make them reliable enough to be effective over a long streak. Weather teams, for example, often push you towards using Pokémon with shared weaknesses, which is really dangerous when you only have three Pokémon available. One weather-changing foe might likewise wreck your entire plan, while a flinch or critical hit on your Trick Room setter might leave your team a sitting duck. Battle Maison play rewards straightforward strategies, so don't try to get too exotic. In previous generations, cripple-and-set-up was the more successful strategy, but so far, the Maison has also rewarded goodstuff teams. Additionally, with more abilities to worry about (because opposing Pokémon now have access to their hidden abilities) and more ways around classic crippling moves (sound moves and Infiltrator now bypass Substitute, and Roar and Whirlwind now bypass Protect, for example), an all-your-eggs-in-one-basket strategy is a lot more risky over a long streak than it used to be. Still, crippling remains viable, particularly with a Durant, and overall its success has been roughly equal to that of goodstuff teams. For a basic goodstuff team, you'll want one hard hitter that can KO a lot of opposing Pokémon on its own, one bulky pivot that can help handle the Pokémon that your primary sweeper can't handle, and a third Pokémon, bulky or hard-hitting, to help fill in the gaps. For example, Jumpman16's Team Kangliscune was built around Mega Kangaskhan, which demolishes most of the Maison on its own but has trouble handling Fighting-types and doesn't appreciate taking status moves; therefore, it should be paired up with a Pokémon that resists or is immune to Fighting as well as with a status absorber. A Pokémon that can perform both these roles at the same time is Gliscor; however, the one status ailment Gliscor cannot take is burn, meaning your third Pokémon should be able to take burns and match up well against Fire-types. Accordingly, Jumpman16 rounded out his squad with Suicune. Because you only have three Pokémon on your team, it's vital that you minimize any glaring weaknesses and have at least a reasonable play line against all the Pokémon you may face. For example, no matter how strong your team is against everything else, if you have little chance to beat a Timid Starmie, your run is doomed, as you will run into one long before you can put together a massive streak. While some enemy sets will of course only be threatening to certain teams, others are dangerous enough that nearly any team you build should plan a strategy for handling them in advance; a detailed singles threatlist is available in the Resources section below. All of the general Maison strategy advice of course applies to singles battles, and minimizing variance and playing conservatively remain the name of the game. As you can set up much more in singles than in other battle formats, it is particularly important to correctly identify when you can safely set up and when you can't. Seizing safe setup opportunities is critical to reducing singles variance, but getting cute and trying to set up in a dangerous situation can be a streak ender. Similarly, even though you can often predict the AI's moves with considerable accuracy, in singles it can be very dangerous to rely too heavily on your predictive skills. It should also be stressed that status protection from the likes of Lum Berry and Substitute in general is especially imperative in singles, as the typical singles team's high reliance on setup moves makes it especially susceptible to status moves' disruptive potential. If you need to play the odds with sleep, paralysis, or confusion on a regular basis, you'll never make it far, which means that some way of preventing status ailments is mandatory—and if your Pokémon does end up getting inflicted with confusion, it's best to just switch out as opposed to engaging in multiple coinflips. One exception to the guideline of avoiding overly predictive plays is when you can switch-stall to drain the PP from a Pokémon that threatens multiple members of your team, but with different moves. Because the AI strongly favors attacking for the KO whenever possible, if there is only one move in your foe's set that will KO your current Pokémon, the AI will almost always choose that move. Thus, if you have a teammate that is immune to or heavily resists that move, you can switch it in safely. Just switching to a teammate that is immune to the incoming attack is bread-and-butter Pokémon, the sort of play that any experienced Trainer can make in his or her sleep, but a safe switch-in alone is not always enough to help you. Your opponent might have a second move that threatens your switched-in teammate, meaning you can't take profitable advantage of the single switch. Thankfully, particularly with good team design, your Pokémon's resistances and immunities may synergize to the extent that your original Pokémon is immune to or resists the move that now threatens your switch-in. In this situation, you can switch back to your original Pokémon and safely blank the second attack. If you continue to switch back and forth between the two Pokémon in this manner, you can stall out at least one of the threatening moves and position your Pokémon for a safe setup. Dragonite and Aegislash stalling out an Earthquake + Stone Edge user is a classic example of this, but there are others, so keep this tactic in mind when developing strategies against foes with broad coverage that appear to threaten multiple members of your team. Just be sure (conservative play once again!) that the repeated switching really is safe, as a bunch of not very effective hits can wear down your Pokémon and you greatly increase the chance of eating an "additional effect" such as freeze or burn when you switch into moves multiple times. After nineteen battles in regular singles, you'll face Battle Chatelaine Nita, with, in no particular order, the following Pokémon. 


After forty-nine battles in Super Singles, you'll again face Nita, this time with, in no particular order, the following Pokémon. 


Singles Recommended PokémonClick the Pokémon sprite to show/hide the information about it DurantDurant takes advantage of the AI's unwillingness to switch out and thereby lets an allied Pokémon fully set up and attempt to sweep. With its hidden ability Truant, Durant first uses Entrainment to pass Truant to the foe. It then switches out while the foe loafs around, and your new Pokémon is able to set up by alternating between Protect on the turns your foe acts and a boosting move on the turns your foe loafs around. While Durant is already quite fast unaided, because of the importance of successfully firing off an Entrainment, it should run a Jolly nature with a Choice Scarf and maximum (or near-maximum) Speed investment. While it won't be using any of its other moves often except in order to occasionally finish off a weakened foe, X-Scissor is a mandatory attacking move in order to immediately KO leads such as Espeon, which can prevent Entrainment with Magic Bounce, and Exeggutor, which can be highly disruptive with its access to Trick Room and Explosion. Options for the final slots include Iron Head, Aerial Ace (for Breloom), Protect (for opposing Truant or Trace users), and Substitute (for PerishTrappers). Durant is vulnerable to Pokémon that can interfere with a first-turn Entrainment through moves such as Protect, Fake Out, and Prankster status moves and by moves or items that cause the victim to switch out or faint before there is time to set up, such as Volt Switch, Toxic Orb, High Jump Kick, and Explosion. U-turn is not normally an issue because Durant resists it, so the AI rarely will use it on the first turn, after which it won't matter because Protect will stop it from working on your setup Pokémon. Also note that Pokémon with Roar and Whirlwind can force out your sweeper even when it uses Protect. While the correct strategy against these sorts of complications depends heavily on the specific Pokémon you are facing, you will definitely want to review the Maison Pokémon list carefully to be sure your team has a plan for handling Pokémon that resist this Entrainment + setup strategy. One option is to use a second support Pokémon to help cripple, while another is to use sweepers that can cover each other's weakness and set up reasonably well unaided. Popular sweepers to partner with Durant include Drapion, Cloyster, and Garchomp, all of which carry Protect, a setup move, and at least one attack. Remember that if you carry just a single attack on your sweeper, you need to be sure that nothing in the Maison is immune to it. Protect + Dragon Dance + Substitute + Dragon Claw Dragonite, perhaps the best choice for a Durant partner last generation, is no longer advisable because Fairy-types are immune to Dragon Claw. For a secondary support Pokémon, Whimsicott has had the most success, using a set with moves such as Switcheroo, to remove Choice items, hax items, and items such as Toxic Orb; Taunt, to prevent the foe from using moves such as Protect and Double Team; and Memento, to help Durant get in unscathed and potentially have Drapion set up even without Entrainment on foes such as Espeon. Sample set:
DrapionA fully set up Drapion is the closest thing to a guaranteed victory in Super Singles: with Acupressure boosting all its stats and its ability Battle Armor protecting it from critical hits, the foes that can even dream of stopping it after setup are very few and far between and can only do so in highly specific circumstances. While it is only viable on crippler teams, it is unarguably the best at what it does. Drapion's moveset is standard for a Durant-supported sweeper, featuring a boosting move in Acupressure, Protect to dodge the foe's attacks on its attacking turns, and Substitute to provide a safety net against status moves and follow-up foes. Somewhat counter-intuitively, it's not at all necessary to alternate Acupressure and Protect, however: a four-move cycle of Substitute (on the loafing turn), Protect, Acupressure, and Acupressure keeps Substitute's PP nearly equal to Protect's, giving Drapion greater ease of setting up in the rare event that it needs to PP stall, such as against Psych Up Cobalion, or switch out. The exceptions are foes with Bug Buzz or Hyper Voice, which hit through Substitute; Pokémon with Taunt, which ignore the Substitute; and Pokémon with Explosion, against which you'll want to have a Substitute up when they decide to use it. Against these foes, you'll generally want Drapion to use Protect on every non-loafing turn after setting up a Substitute. Drapion's set is rounded out by Knock Off, its initially most high-powered STAB move. Drapion benefits most from an Adamant nature with maximum Attack and HP investment, as this allows it to OHKO moderately bulky Pokémon that resist Dark such as Terrakion when fully set up, while it doesn't care too much about its Speed or defensive stats with +6 in everything and the protection of a Substitute. The next best Durant-supported sweeper is Cloyster, which can bypass Sturdy and Focus Sash with the combination of Skill Link and Icicle Spear and has access to arguably the best boosting move in the game in Shell Smash, allowing it to perform much better than Drapion if it ends up having to set up without Entrainment. An especially notable mention goes to Glalie, which can make for a surprisingly effective sweeper thanks to its hidden ability, Moody, and Frost Breath's guaranteed critical hit rate allowing it to bypass the foe's defensive boosts; its set would be rounded out by the self-explanatory Substitute and Protect as well as by Taunt, which not only allows Glalie to block opposing status moves but mainly is used to prevent it from running out of PP during setup. Sample set: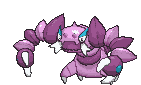
KangaskhanBy far the most potent new singles option of this generation, Kangaskhan is an absolute beast thanks to its Mega Evolution. Courtesy of Parental Bond, Mega Kangaskhan hits incredibly hard, uses Power-Up Punch as a damage-dealing Swords Dance, and merrily breaks Substitutes, Focus Sashes, and Sturdy as it spreads its devastation. With good Speed, excellent bulk, and only one weakness, Mega Kangaskhan is very hard to take down and has been the backbone of many top-level Maison teams. Pretty much all Mega Kangaskhan sets run Return, for its massive STAB damage and strong neutral coverage, and Sucker Punch, for its priority and ability to hit the Ghost-types that laugh at Return. The remaining two moves usually vary based upon what role Mega Kangaskhan is trying to play. Played as a setup sweeper, Mega Kangaskhan runs Power-Up Punch and either Earthquake or Crunch, while as a cleaner, designed to come in and finish off what its teammates can't, Fake Out and Earthquake are typically preferred. Both are wonderful options. Fake Out Mega Kangaskhan is extremely hard to beat one-on-one, as STAB Parental Bond Fake Out opens up most foes to being KOed on the following attack, while Power-Up Punch Mega Kangaskhan can sweep many teams with ease after a single boost and is able to set up even through the normally frustrating Trick, Taunt, and Encore. Like most sweepers, Mega Kangaskhan does not enjoy being statused, but the priority on Sucker Punch at least provides some resilience against paralysis. Adamant guarantees Mega Kangaskhan some crucial KOs, and Speed is irrelevant when using Sucker Punch, but Jolly does help Mega Kangaskhan outspeed some hard-hitting Fighting-type threats such as Heracross and Gallade on the first turn of battle. As Fighting-type moves are Mega Kangaskhan's only weakness, it attracts a lot of them, so be sure to pair it with a Pokémon that resists or is immune to Fighting, such as Gliscor or Aegislash. Sample set: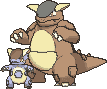
GliscorAs far as stall Pokémon and pivots go, Gliscor, the ultimate play-it-safe Pokémon, is second to none. Between Poison Heal and alternating Substitute and Protect, Gliscor has 32 turns of uninterrupted PP or Toxic stalling, and as such it will beat anything one-on-one that either can't 3HKO it or is slower and has fewer than 32 PP with which to harm it; it can either Toxic stall its foe by itself or PP stall a foe's most threatening move and allow a teammate to set up on it. After switching in Gliscor, it generally should focus first on PP stalling its foe's most dangerous move; then, it should try to Toxic stall a faster foe to death. Earthquake should only be used when Toxic stalling is outright inefficient. Don't make the mistake of trying to directly KO an opposing Ground-weak Pokémon such as Raikou; when doing so, Gliscor risks having its Substitute broken by a last-ditch critical hit and thus having to face a threatening follow-up Pokémon without a Substitute's safety net. Obviously, this can be prevented easily by following the slower but way more reliable route of Toxic stalling. All four of standard SubToxic Gliscor's moves are mandatory; Substitute and Protect enable Gliscor to outstall many a foe, Toxic is Gliscor's primary killing tool, and Earthquake allows Gliscor to KO slower, frail, or Toxic-immune foes. The EVs are less clear-cut. Gliscor has had most success using a heavily specially defensive EV spread, allowing it to switch in on and outstall a large array of dangerous physical and special attackers while also allowing it to maintain and thus come out on top with a Substitute against several faster foes. Alternatively, a Jolly Gliscor with near-maximum Speed investment is able to more reliably PP stall several faster, threatening foes such as Kingdra and Gyarados; however, such a spread considerably compromises its switching capabilities and naturally lowers the number of faster foes Gliscor can maintain a Substitute against. Which spread to use is team dependent. Gliscor is a team player and as such will fit on many a team, but it performs best as a switch option for a lead that draws in attacks Gliscor resists or is immune to, such as Mega Kangaskhan, Greninja, or Cloyster. Sample set: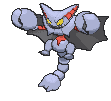
AegislashAnother new addition this generation, Aegislash is the Ghost / Steel type many have long desired. While slow, Aegislash is wonderfully bulky in Shield forme and a hard hitter in Blade forme. Typical sets run Shadow Sneak for STAB priority, Sacred Sword for its excellent coverage, King's Shield for stalling and lowering the foe's Attack, and Swords Dance for sweeping power. Iron Head is an option over Sacred Sword that provides a harder hit on neutral targets and covers different threats but has worse neutral coverage overall and doesn't bypass defense and evasion boosts. Even with Steel losing its resistances to Dark- and Ghost-type attacks, Aegislash has an impressive resistance spread and can wall and set up on many things. Ideally, Aegislash comes in on a physical attacker, cripples it by lowering its Attack stat with King's Shield on a contact move, sets up with Swords Dance, and begins attacking. Even when Aegislash cannot fully set up, it's both bulky and hard-hitting enough to take out many foes. To ease setting up and enable recovery, Leftovers is the preferred item on Aegislash, and it pairs well with the extra turns gained by using King's Shield. Aegislash wants an Attack-boosting nature, but both Adamant and Brave are viable options. Adamant Aegislash outspeeds a few more things, but the majority of enemies will still be faster than it. Given that Aegislash stays in Shield forme until it attacks, it's often advantageous for Aegislash to be slower than its foe when it is using Sacred Sword so that it can take that turn's attack while still in Shield forme. This cuts in favor of a Brave nature with a zero Speed IV. Aegislash must be careful against foes with status moves, as King's Shield does not block them, and while it is immune to poison, Aegislash hates being burned, and paralysis turns Shadow Sneak into a 25% chance for suicide. Aegislash's biggest flaw as a physical wall is its vulnerability to the extremely common Earthquake. Because the move does not make contact, King's Shield does not cripple Earthquake users, and even in Shield forme, Aegislash is badly dented by Earthquake. Accordingly, Aegislash really wants to be paired with a Flying-type or Levitate user. Dragonite, in particular, pairs very well with it. Sample set:
DragoniteDragonite remains a great choice even after the introduction of the Fairy type. The smiling Dragon hits like a truck, particularly after a Dragon Dance or two, and it is extremely difficult to OHKO thanks to Multiscale. After just one turn of setup, Dragonite outspeeds and OHKOes a lot of the Maison, and after a second, very few things can survive its attacks, absent a Focus Sash or Sturdy. Movewise, Outrage is Dragonite's preferred STAB option due to its incredible power, and Dragon Dance is a must for letting it outspeed and sweep through foes. Typical offensive sets round out their coverage with Earthquake and Fire Punch, but Extreme Speed can be used to dent priority-using or speedy foes, Dragon Claw to give Dragonite a solid STAB move that doesn't lock it in, and Roost to give it the chance to take advantage of Multiscale several times while playing a bulkier role. An Adamant nature with full Attack and Speed investment is the default for pure offensive Dragonite, but particularly for Roost sets, more HP works well too. Lum Berry is easily the best choice of item, as it both protects against the confusion from Outrage and allows Dragonite to set up with Dragon Dance safely even in the face of a status move from the foe. The addition of the Fairy type means that last generation's cripple team staple of Dragon Claw + Dragon Dance + Substitute + Roost is no longer viable, but there are few enough Fairies in the Maison that Outrage is still fine when used in a normal attacking set. Dragonite's biggest weakness is its low base Speed. Because most other Maison Dragons can initially outspeed it, an unboosted Dragonite can take a lot of damage from an opposing Dragon, and critical hits can sometimes OHKO it even through Multiscale. Lots of Ice-type move users can outspeed Dragonite, too. A Steel-type teammate such as Mega Scizor or Aegislash can cover all of Dragonite's weaknesses, making one a recommended partner. While generally not as good as Dragonite, other Dragon Dance users remain solid options: Haxorus has greater power and initial Speed and access to Mold Breaker to ignore Sturdy, Levitate, and Multiscale, but its relative lack of bulk makes setting up considerably harder; and Mega Charizard X similarly is stronger and faster and, unlike Dragonite, has access to a usable secondary STAB move, but its inability to hold Lum Berry and Flare Blitz's recoil compromise its setup and sweeping capabilities. Lastly, while it doesn't have access to Dragon Dance, Garchomp is another excellent option for a Dragon-type, boasting an Electric immunity, an excellent Speed tier, a great secondary STAB type, and the ability to run both a Substitute + Swords Dance and a Choice Scarf or Band set. Sample set:
SuicuneEven without any team support, Suicune can switch into and defeat a huge number of Maison Pokémon. Besides being able to counter many Pokémon, Suicune is often able to set up to the point that subsequent foes become pushovers as well, a big advantage compared to other bulky Water-types such as Milotic. Water is an amazing defensive typing, and in tandem with Suicune's big defenses, this can make Suicune very tough to take down. Scald, Calm Mind, and Rest are Suicune's staple moves, as they let it set up and then sweep in the face of many attacks. While Substitute is a usable option as the fourth move thanks to the protection it provides against critical hits and status and the "extra life" it gives against subsequent foes, Icy Wind is a great alternative that has been more successful and can help out by slowing down speedy foes and giving good coverage against Dragon-types. Because Calm Mind boosts special stats, almost all Suicune run a Bold nature with near-maximum HP and Defense to maximize their ability to tank physical attacks and a few EVs in Speed to avoid awkward Speed ties. Leftovers and Chesto Berry are both good item choices. Leftovers helps over the course of long setups and counteracts weather damage, while Chesto Berry is useful when trying to stall out Pokémon with one particularly threatening attack where two close-succession Rests might be needed early in the process of setting up. Note that Pressure, a normally unexciting ability, is pure gold on Suicune. Many Pokémon have only one move that can break Suicune's Substitute or otherwise threaten it, particularly after a Calm Mind or two, and Pressure lets it stall out that move and easily set up to +6 / +6. Additionally, while there are more Pokémon potentially immune to Water-type moves this generation because foes can now have their hidden abilities, this is not a big problem even when running mono-Water coverage because Suicune, aided by Pressure, is able to beat most of these Pokémon by stalling them out. If you lack a Suicune or don't have one with good stats and nature, Milotic is a reasonable replacement. Good bulk, particularly with Marvel Scale, reasonable Speed, reliable recovery, and the flexibility to attack decently well make Milotic a fine choice for a bulky Water-type Pokémon in the Maison. Sadly, however, Toxic-stalling Milotic loses badly to bulky boosting enemies with Rest and, unlike Suicune, can't set up on things it dominates to make sweeping subsequent Pokémon easier. Sample set: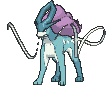
GreninjaWith its incredible Speed, Greninja is faster than most of the Maison, and it has sufficient type coverage and attacking power to get a lot of OHKOs, particularly with a boosting item. Greninja's biggest advantage over similar Pokémon such as Starmie is the added punch from Protean, which essentially gives all of its attacks STAB, sometimes also turning the foe's super effective counterattack into something not very effective—however, due to Greninja's horrendous bulk, this is generally not a tactic you should be relying on if avoidable. Although Greninja is capable of running a mixed or physical set, a special set is best, as it avoids awkward EV splitting and takes advantage of Greninja's higher Special Attack; additionally, what used to be mixed Greninja's main draw in competitive play, Gunk Shot, is unusable in the Maison due to its horrendous accuracy and the absence of its main targets Clefable and Azumarill from the Maison's roster. Surf, Grass Knot, Ice Beam, Dark Pulse, and Extrasensory are your best move options, so choose according to the type of coverage your team needs. When using Greninja as a switch option, Scald is preferred over Surf, as Greninja will most likely be your go-to switch-in for Ice-type attacks, making Scald's freeze-thawing side effect way superior to Surf's minor power increase. You'll want Timid as Greninja's nature because it'll be slower than a number of threats if Modest, but you can remove a few Speed EVs for added HP if you want and still have Greninja outspeed the important stuff. Choice Specs lets Greninja hit the hardest and has no recoil, while Life Orb lets it switch attacks and take optimal advantage of Protean. Life Orb is mandatory in the lead position, while Choice Specs is feasible when using Greninja as a switch option because then its lock-in effect isn't as detrimental. Greninja's weakness is that it can't boost and is really frail, so it is vulnerable to bulky Pokémon that can take a hit or Choice Scarf users that can outspeed it. Because it depends heavily on its Speed, paralysis wrecks it too. Due to Greninja's terrible bulk and general inability to sweep entire teams, it will have to do a fair amount of switching, especially when used in the lead position; accordingly, it should be paired with highly resilient teammates with good defensive synergy, such as Mega Scizor and Gliscor. While Protean and Greninja's terrific Speed generally make it the best all-out special attacker available, other options certainly aren't unusable: examples include Starmie, which has access to Natural Cure, a few alternate coverage moves such as Thunderbolt and Dazzling Gleam, and somewhat better bulk; and Latios, which is more powerful, has access to a setup move in Calm Mind, and can even run crippling sets using Memento. Sample set:
ScizorExcellent typing gives Scizor only one weakness and a lot of key resistances, and with Technician, its STAB moves Bug Bite and Bullet Punch pack an amazing punch. Better yet, Scizor has a very potent Mega Evolution. Scizor can play a boosting tank role with Roost and Swords Dance or can replace Roost with Superpower for better coverage; while Roost is the all-around better option due to how greatly it eases setup, Superpower is mandatory when using Scizor as a lead in order to defeat Magnet Pull Magnezone. It can switch into a lot of scary moves thanks to its typing, and, especially after a Swords Dance, it can take great advantage of priority Bullet Punch to KO a number of Pokémon before they can act. If you are using a Dragon-type, you'll likely want a Steel-type to cover its weaknesses, and Scizor is one of the best options available. Just make sure your team is not otherwise weak to Fire-type moves, as that 4x weakness hurts, and remember that Scizor no longer resists Ghost- and Dark-type attacks. A typical set will run an Adamant nature with maximum Attack, near-maximum HP, and some Speed creep. Cutting Attack is a bad idea, as full Attack investment just barely allows Mega Scizor's +6 Bullet Punch to guarantee the OHKO on a great number of frail Fire-types, which would otherwise either OHKO it or force it out. Itemwise, the best choice by far is Scizorite, as Mega Scizor is faster, bulkier, and harder-hitting than its regular cousin, but if you are already committed to another Mega Evolution on your team, Leftovers works well on the Roost variant while Life Orb is probably best on the Superpower one. Lum Berry is also reasonable, as Scizor hates being burned. Beware, though, as Mega Scizor's bulk increase and slightly greater Speed make it the far better pick for Super Singles. Sample set:
ChanseyWith Eviolite and full Defense investment, Chansey becomes one of the bulkiest Pokémon in existence. Even special sweepers with boosting moves struggle to take it down, particularly given their general lack of Special Attack investment. Natural Cure can also allow Chansey to serve as a catch-all status absorber. With enough bulk to survive consecutive critical hits from most attacks, Chansey can generally make it through fairly bad parahax without too many problems. Even freezes will rarely threaten it, as it can generally last for an insane number of turns while tanking Ice Beams or Blizzards. In many cases, Chansey can single-handedly patch up a team's weakness to many Fire- and Electric-types, barring the relatively exploitable Infernape and Blaziken. Chansey can capitalize on its impenetrability by stalling out the opponent's PP, allowing a different Pokémon to set up, or by going in for the KO with Seismic Toss or Toxic. Soft-Boiled is an essential for recovery, with Seismic Toss being Chansey's most reliable damaging move. The aforementioned Toxic is always a good choice, but Chansey can also pull off a surprisingly effective "full stall" set with Minimize and Substitute, with the evasion boosts allowing it to stall out the foe's PP with even greater ease. Growl is surprisingly effective in the fourth slot, allowing Chansey to turn otherwise dangerous Curse and Dragon Dance users into setup bait and neutering any physical sweeper that lacks Defiant, Clear Body, Hyper Cutter, or a boosting move. With a maximum of 64 PP, Growl essentially gives Chansey an infinite number of turns on the field, which can prove useful in stalling out foes like Gengar. While Aromatherapy is a strong choice for Chansey in rotation battles, it is less effective in singles, where it will have to dig deeper into its PP. If you're using Chansey, it should also be your team's primary status absorber anyway, so Natural Cure renders Aromatherapy's team support moot. Chansey's biggest weaknesses are physical Fighting-types, OHKO move users, and Pokémon with Swords Dance or Belly Drum (and Dragon Dance / Curse users if you're not using Growl). Most of those are manageable with the right teammates, but the immediate threat posed by Swords Dance and OHKO moves means that Chansey is a relatively poor choice as a lead. It performs best as a backup that can switch into dangerous status moves or special attacks. Sample set:
SalamenceWhile Dragonite has been the traditional Dragon-type lead for Super Singles teams, Mega Salamence boasts a number of impressive advantages over the jolly orange Dragon. First, Intimidate allows it to lower the Attack stat of opposing leads that lack Defiant, Hyper Cutter, or Clear Body, allowing Mega Salamence to use its impressive physical bulk to set up. A Jolly Mega Salamence's Return is also stronger than an Adamant Dragonite's Outrage and lacks the drawback of locking the user in. Finally, Mega Salamence's Speed allows it to block incoming status moves with Substitute, granting it free turns to set up Dragon Dances. Because nothing is immune to Aerilate Return, Mega Salamence can afford to run a mono-attacking set, while Fairy-types force Dragonite to run Earthquake for coverage. However, because more foes resist Flying than Dragon, Mega Salamence often has a harder time sweeping with just one Dragon Dance than Dragonite does. Its lack of Multiscale and slightly lower special bulk compared to Dragonite can also reduce Salamence's ability to tank dangerous special moves such as Thunderbolt, while the lack of a Lum Berry puts Mega Salamence at risk of paralysis from such moves. Therefore, Mega Salamence is best paired with teammates that give it a good shot of getting to +4 or +6. Chansey deserves special mention for its ability to tank the special attacks Salamence's Intimidate won't neuter, while Mega Salamence can usually KO Swords Dance and Stored Power users before they get too threatening. You can try to fit Earthquake onto the set, but you'll be hard pressed to find a spot for it. Dragon Dance and Return are mandatory. Substitute gives Mega Salamence the effective status immunity that prevents it from being an inferior Dragonite, while Roost allows it to tank attacks well enough to get the four to six Dragon Dances it needs to sweep. Note that, at +6, even Pokémon that 4x resist Flying such as Magnezone and Aggron are 2HKOed, with Substitute preventing them from harming Salamence on their first turn out. Only Bastiodon can consistently avoid a 2HKO from +6 Return, but its relatively low power means Salamence can usually KO Bastiodon anyway. The same role can be performed to great effect by Mega Gyarados as well; while it has much worse base stats overall, most notably Speed, has much less power because of a lack of high-Base Power moves, and doesn't have recovery, it makes up for this to a good extent with a change in defensive typing upon Mega Evolving, allowing it to take advantage of a much wider ranger of foes, and the ability to viably run dual STAB moves, which lets it get by with fewer boosts than Mega Salamence needs and is complemented further by its Mega Evolution's ability, Mold Breaker, allowing it to ignore defensive abilities like Sturdy and Water Absorb. Sample set:
Doubles AdviceIn Maison doubles battles, your team consists of four Pokémon, with two starting in battle and two in reserve. This significantly changes ideal strategies compared to singles play. Because you are facing multiple foes at once, setup and stall Pokémon have a harder time. In singles, it's often easy to spend a turn using Dragon Dance or switching in your Suicune and slowly boosting up, but where you risk being attacked twice in the same turn, this is a lot less reliable. Accordingly, you typically want your doubles Pokémon to be able to start contributing on the very first turn of the battle. Similarly, because of this incentive to attack early and often, you'll usually do a lot less switching with your doubles Pokémon than with your singles ones. Despite these limitations, doubles opens up a number of additional strategies. With two Pokémon in at once, it's much easier to build around and benefit from weather, Trick Room, and Tailwind and defeat your foes before these field conditions time out. You can also take advantage of moves that affect multiple Pokémon at once, either just your opponents' (e.g. Hyper Voice) or all other Pokémon (i.e. Earthquake) to more efficiently deal out damage, though a move that hits both opposing Pokémon will be at only 75% of its usual power. Moves that hit all other Pokémon are of particular note, as even though they can be extremely powerful, you need to plan your team carefully to support them. Having one of your Pokémon use Earthquake when its partner is Ground-weak is not often advisable, for example. Partnering immunities is one of the easiest ways to do this. Garchomp and Thundurus are a classic example. Thundurus is immune to Garchomp's Earthquakes, while Garchomp is immune to Thundurus's Discharges. You can do even better when one of your Pokémon has a boosting or recovery ability such as Storm Drain or Water Absorb. A Pokémon can even hold the Absorb Bulb item to steal a boost from its partner's Surf, a popular strategy with Ludicolo, which has Swift Swim and a 4x Water-type resistance. Pokémon with the Telepathy ability are also safe from their ally's attacks. Finally, moves such as Protect and Wide Guard can shield the vulnerable partner for a turn. Because of the AI's penchant for going after KOs and targeting weaknesses, you can often predict which Pokémon your foes are going to attack. When you expect them to double up on the same target, you can take advantage of this by using Protect to buy yourself a turn. Your first Pokémon uses Protect, both foes attack it, and your second Pokémon gets to attack completely unscathed. For this reason, it's common for the majority of Pokémon on a doubles team to carry Protect. Making sure your Pokémon don't share weaknesses makes Protect prediction easier, but you can go even further by using a "bait Pokémon" specifically designed to draw as many attacks as possible. Level 1 Sturdy Aron is the classic (and best) example of this, but any reasonably frail sort of Pokémon can often be effective bait. Besides Protect, a few other moves deserve special note for their utility in doubles. Oftentimes, one of your foes will be very threatening, but you'll be unable to cleanly KO it before it acts. A bulky Trick Room-using foe is one good example, and a super fast Pokémon that can hit your leads hard is another. Fake Out can be incredibly helpful in such a situation, neutralizing the foe's first turn while buying your partner the time it needs to KO the threat. Mat Block, while being limited to Greninja, is kind of like a super Protect against many foes, as it can buy your partner a free first turn even if the foes split their attacks between your two Pokémon. Just make sure you know the sets you are facing, as Mat Block does not block status and has neutral priority, so careless use can waste a turn instead of saving you one. Wide Guard is difficult to use effectively against the AI, as many AI Pokémon do not carry spread moves, but it's important to keep in mind when it's part of a foe's set. Because Wide Guard shuts down all your spread attacks for a turn, it can wreck you if both of your Pokémon choose such attacks. Conversely, if you play around Wide Guard, you can often get a free turn merely by using single-target moves against it. Helping Hand, completely unusable in singles play, has +5 priority and boosts your partner's next attack by 50%, which can be very helpful in turning certain 2HKOs into OHKOs, particularly spread moves with their 25% power drop. Lastly, as noted earlier, because Tailwind, Trick Room, and weather moves benefit your entire team, these moves and, in the case of weather moves, their corresponding abilities are much more viable in doubles than in singles play. The process of building a goodstuff team in doubles is similar to singles in that the same principle of "use a potent lead and use switch options that take advantage of the foes your lead struggles against" applies. The main difference is that you should focus on offensive rather than defensive synergy. In singles, the focus is on switching in on otherwise threatening foes, which naturally is considerably harder to consistently pull off in doubles due to the possibility of being double targeted; as such, in doubles a lead Pokémon should be able to immediately defeat (a significant portion of) its ally's checks. Ideally, a lead pairing will also be able to generate a free turn in some way most of the time, such as through the aforementioned Fake Out or Mat Block, or reliably set a field condition such as rain or Trick Room. Accordingly, when building a team around, for instance, a powerful spread attacker in Mega Gardevoir, Weavile makes for an excellent partner for its ability to easily KO fast Ghost-types that threaten Mega Gardevoir, such as Gengar, as well as its ability to buy a free turn via Fake Out, while Mega Gardevoir can destroy Fighting-types in return. If your lead pairing's offensive synergy is sound, there should only be a moderately small, clearly identifiable, number of foes remaining they lose against; your third team member must be able to defeat those and, preferably, directly counter the really threatening ones. Continuing on Weavile and Mega Gardevoir, such a pairing will have trouble with Steel-types, can struggle with multiple Poison- or physical Fire-types, and will struggle with Trick Room if they cannot prevent it from going up; a partner that soundly addresses these issues is Gastrodon. Ideally, at this point, your three Pokémon should be able to technically beat every individual foe. However, there can and will still be a number of foes that will significantly threaten them in even minorly suboptimal circumstances—for instance, a foe that troubles your lead pairing might be paired up with a Pokémon that defeats your preferred switch option. For our specific team, an opposing lead Scizor might be paired up with a Cradily, preventing Gastrodon from switching in safely. As such, your fourth team member should be a glue Pokémon and a safety net of sorts; it should also be able to address most of your lead pairing's problems while having good type synergy with your third team member and blanket checking many foes. Accordingly, Scizor makes a good fourth member of this team; it obviously falls to Fire-types, but those are the least pressing of the lead pairing's problems, and it performs decently in Trick Room and soundly beats most Poison- and Steel-types while also covering Gastrodon's Grass weakness and having its Fire weakness covered by Arceus's favored bottom feeder. After nineteen battles in regular doubles, you'll face Battle Chatelaine Evelyn, with, in no particular order, the following Pokémon. 


After forty-nine battles in super doubles, you'll again face Evelyn, this time with, in no particular order, the following Pokémon. 


Doubles Recommended PokémonClick the Pokémon sprite to show/hide the information about it AronBecause the Maison only levels Pokémon down to level 50, not up to it, level 1 Aron is the best bait Pokémon in the game. Aron has just twelve HP, so pretty much any attack can do enough damage to KO, making Aron exceptional at drawing foes' attacks. Better yet, Aron has the Sturdy ability, so when it is equipped with Berry Juice, one round of basic attacks won't even KO it. The first attack will trigger Sturdy, the Berry Juice will heal Aron to full, and the second attack will trigger Sturdy again. In tandem with Protect, this often allows Aron to serve as bait for three turns, more if you are lucky and get Protect to work twice in a row. While most attacking moves will be near-worthless when used by such a low-level Pokémon, Endeavor becomes amazingly powerful because it will reduce its target's HP all the way down to Aron's minuscule total. You can even give Aron weather or status moves for extreme corner-case situations, but really, Protect and Endeavor are all Aron needs. You don't even have to bother with nature, IVs, or EVs, which is very convenient. While Aron plays well on many sorts of teams, it is especially potent under Trick Room, as with such a low Speed, it will almost always act first, allowing it to more easily use Endeavor multiple times before being KOed. Sample set:
GreninjaJust like in singles, Greninja makes for an excellent special attacker, as its exceptional Speed, good Special Attack, and ability Protean granting all its attacks STAB allow it to outspeed and KO a wide variety of Pokémon. But in doubles, Greninja becomes even better thanks to its signature move Mat Block, described above. Against many foes, Mat Block buys Greninja's partner a free first turn, typically leaving your team with a big advantage. It's important to remember that against enemies likely to use priority, status, or field effect moves, Mat Block won't help you, so against them, forgo the first-turn Mat Block and attack normally. But the option to protect the entire team the first turn is extremely valuable, particularly in tandem with Greninja's attacking prowess on later turns. Greninja depends on its Speed and Special Attack, so unless you are trying to run a mixed set, full Speed and Special Attack investment is recommended. Mat Block, Grass Knot, and Ice Beam are the most common moves on doubles Greninja, while moves such as Dark Pulse, Extrasensory, and a Water-type STAB move can be added based on specific team needs. Surf is useful if your teammate doesn't mind taking a Water-type hit, while Scald provides a single-target Water-type option. Greninja is very frail, so a Focus Sash is its preferred held item; it is especially useful for allowing Greninja to get off an attack against fast, unpredictable foes such as Choice Scarf Terrakion, Aerodactyl, and Choice Scarf Darmanitan. Alternatively, an Expert Belt or Life Orb can help turn certain 2HKOs into OHKOs. In terms of teammates, Greninja is best paired up with an ally that can capitalize on the Mat Block-generated free turn not only by freely attacking a single foe but also by setting up if possible; Nasty Plot Mega Lucario and Speed Boost Mega Blaziken have been used to great success. Additionally, even with a Focus Sash, an Electric-immune switch option is nearly mandatory, as Greninja is outsped by several unpleasant Electric-types such as Choice Scarf Manectric, Jolteon, and Electrode, which prevent it from using Mat Block reliably; trying to tank their attack is feasible in corner-case situations, but it is generally not advisable due to the risk of paralysis. Good options include Thundurus-T, Gastrodon, and Garchomp. Sample set:
DusclopsWith outrageous Eviolite-boosted bulk and its Ghost typing rendering it immune to Fake Out, Dusclops is one of the most reliable Trick Room setters available. While definitely viable on goodstuff Trick Room teams, Dusclops has had most success as a partner to Endeavor Aron, first twisting the dimensions to make Aron the fastest Pokémon on the field and then finishing off the foes one by one after Aron brings them down to 12 HP; it also provides amazing scouting utility via its ability Frisk. Apart from the obvious Trick Room, Dusclops should run Night Shade as an attacking move to finish off its weakened foes, as well as Brick Break to finish off Normal-types and select Sitrus Berry holders such as Bastiodon and Rampardos. Its final moveslot can be dedicated to a utility move: Foresight is the best option when paired up with Aron, as this allows Aron to use Endeavor against Ghost-types and has the additional utility of negating Double Team, but other usable options include weather moves, Toxic, and Gravity. Alternate Trick Room setters include Aromatisse, which makes up for its considerably worse bulk with its ability Aroma Veil preventing Taunt and its ability to hold a Lum Berry; Mega Audino, which similarly has enormous bulk and capitalizes on this by changing its defensive typing upon Mega Evolving; and Slowbro, which is immune to Taunt, has access to Heal Pulse, and has actual offensive presence. Sample set:
ScizorAn absolute powerhouse in singles, Scizor also makes for a fine pick in doubles as one of the best team players available. Its Technician-boosted Bullet Punch provides an excellent cleaning tool, its Bug Bite is as powerful as ever, and its terrific defensive typing allows it to blanket check a wide array of threatening foes. Because of said defensive typing, Scizor performs best as a switch option, and its all-round capabilities and team-playing nature allow it to fit on a wide array of teams. Due to the general difficulty of setting up in doubles, Life Orb Scizor is generally preferred over its Mega counterpart for its greater immediate power; importantly, its Bullet Punch nets a nearly guaranteed OHKO on Terrakion, which an unboosted Mega Scizor fails to secure. However, Mega Scizor's greater bulk and Speed certainly make it worth considering. Similarly to in singles, typical Scizor sets will run maximum Attack, near-maximum HP, and slight Speed investment. In terms of moves, Bullet Punch and Bug Bite are mandatory STAB moves, while Protect is also required for drawing in Fire-type moves and for the general utility it provides. Superpower generally is Scizor's best coverage option, making quick work of the Steel-types that resist its STAB combination. However, if your team already has Fighting coverage available, Swords Dance remains a viable alternative to counteract Intimidate or to set up on a free turn and make Scizor even harder to stop. If the Life Orb is taken, Choice Band makes for a fine alternative; it notably allows some Attack EVs to be invested into bulk. As Bug is a highly undesirable attacking type to be locked into, such a set generally prefers U-turn over Bug Bite, however. If you feel Scizor isn't what your team needs, alternate options for a sturdy, priority-using switch option include Wide Lens Azumarill and Assault Vest Conkeldurr. Sample set:
WeavileWeavile is an excellent support attacker and dedicated Fake Out lead. It is one of the best options available for this role, for a number of reasons: its Dark-type STAB moves make quick work of the Ghost-types that are immune to Fake Out, its frailty and horrendous defensive typing make it excellent bait, and its base 125 Speed allows it to outspeed all opposing Fake Out users (except opposing Weavile) and prevent their Fake Out if necessary. Movewise, Weavile has a number of options at its disposal, but it generally prefers a set of Fake Out / Knock Off / Ice Punch / Protect; Fake Out is the reason to use Weavile in the first place, Knock Off and Ice Punch are strong, reliable STAB moves, and Protect allows Weavile to capitalize immensely on its lure potential, in addition to its usual benefits. Beat Up is an interesting alternate option for a Dark-type STAB move: it allows Weavile to form the well-known TerraVile combo with Terrakion, where Weavile uses Beat Up to give Terrakion a tremendous Attack boost by triggering the latter's ability Justified multiple times. Additionally, Beat Up is a serious option to consider over Knock Off if Weavile is used as a lead in triples, as it has a more consistent Base Power, doesn't make contact, and bypasses Focus Sash and Sturdy. Alternate options include Ice Shard for priority and Low Kick for coverage, but priority is generally wasted on a Pokémon with Weavile's high base Speed and Weavile usually can get most mileage out of its STAB moves. Itemwise, Focus Sash is essentially mandatory, as Weavile's defensive capabilities are absolutely nonexistent and it can capitalize on its baiting capabilities even better after being knocked down to 1 HP. Weavile is best paired up with a powerful attacker that can capitalize on the free turns it creates, such as Mega Gardevoir. Alternate Fake Out users include Mega Kangaskhan, which obviously is more of a powerhouse than a supporter; Infernape, which lacks Weavile's specific qualities but makes up for it with good mixed attacking stats; and Hitmonlee, which is more powerful than Weavile, is immune to paralysis, and has access to the hardest-hitting priority move among Fake Out leads in Sucker Punch—unfortunately, it generally cannot afford to run Protect and Sucker Punch is only available from Generation IV games. Sample set:
GardevoirMega Gardevoir's Pixilate Hyper Voice makes it a wrecking ball capable of demolishing a huge chunk of the Battle Maison: its enormous spread damage and excellent neutral coverage make Mega Gardevoir a worthwhile pick for many teams. A simple EV spread with maximum Special Attack and Speed investment is the best option for Mega Gardevoir; it also strongly prefers a Timid nature over Modest because it needs all the Speed it can get while it's plenty strong as is, although Modest can be feasible with Icy Wind support. Movewise, aside from the self-explanatory Hyper Voice, Mega Gardevoir should run Protect, in order to defuse strong physical or faster attackers, and Psyshock, as a secondary STAB move that can cover special walls such as Blissey. Plenty of options are viable in the final slot: while horrendously weak when not 4x super effective, Hidden Power Ground provides useful coverage against the Steel-types that resist Mega Gardevoir's STAB moves; Shadow Ball is a usable option in order to dispatch Trick Room setters; and utility moves such as Taunt, Substitute, and Destiny Bond all have their uses. This slot is highly flexible and you won't be using it often, so pick what suits your team best. An additional benefit of Mega Gardevoir is its base forme's ability Trace, which provides valuable scouting utility. However, Telepathy is preferred if you're using Mega Gardevoir as a switch option on a team that also includes an Earthquake user. Mega Gardevoir should ideally be paired up with a partner that can generate free turns, such as Weavile or Mat Block Greninja. Sample set:
SalamenceOne of the most broken Pokémon ever to grace the OU tier, Mega Salamence makes for a highly versatile offensive powerhouse in Maison doubles. Its excellent mixed offensive stats, tremendous Speed, and outrageous bulk for an offensive Pokémon allow it to run both physical and special sets effectively; this is compounded by its ability, Aerilate, which boosts Normal-type moves' power and turns them into Flying-type moves, and its wide movepool. Due to its great bulk aided by its pre-Mega ability Intimidate, Mega Salamence is one of the few Pokémon that can run setup moves effectively in doubles; accordingly, a physical set would be centered around Dragon Dance, further featuring Aerilate-boosted Return as its main STAB move as well as the self-explanatory Protect. The set is rounded out by Earthquake, which provides the best coverage alongside Flying. Special sets, on the other hand, utilize Mega Salamence's Aerilate-boosted spread move, Hyper Voice. As special Mega Salamence has no access to setup moves, such a set can run Tailwind, which allows Mega Salamence not only to outspeed the entire Maison itself but also to support its teammates, and with adequate support, it has no trouble setting it up due to its great bulk. Flamethrower is the best coverage option available for a special set, taking care of Steel-types, while Rock-types should then be left to Mega Salamence's teammates to take on; alternatively, Dragon Pulse can be run, which will leave Mega Salamence walled by Steel-types. Both variants benefit tremendously from a partner that can buy them a free turn; good options include Fake Out users such as Hitmonlee and Infernape, and the physical set pairs especially well with Mat Block Greninja, which can usually provide it with a free Dragon Dance. While Mega Salamence is fairly self-sufficient otherwise, it does heavily appreciate a Steel-type switch option such as Scizor or Aegislash for defensive synergy. Sample sets:
CameruptExtremely slow yet very powerful, Mega Camerupt is the textbook definition of a Trick Room attacker. Its best attack is its powerful spread Eruption, and Sheer Force-boosted Earth Power provides a fine secondary STAB move. Mega Camerupt's coverage move is team-dependent. It naturally benefits from Sunny Day support in order to boost its Eruption's power; if this is present on your team, Solar Beam is the preferred option in the third slot for its amazing coverage on Water-types. Alternate options include Flamethrower, which provides a Sheer Force-boosted Fire-type STAB move that doesn't lose power as Mega Camerupt's health drops, and Ancient Power, which is also boosted by Sheer Force and allows Mega Camerupt to take on Pokémon such as Charizard and Moltres; however, these generally aren't too threatening to it. Aron is an amazing partner to Mega Camerupt, not only due to the general utility it provides Trick Room teams with but also due to its access to Sunny Day; otherwise, Mega Camerupt appreciates partners that can beat Water-types as well as Pokémon that can take on Ground-immune Dragon-types such as Hydreigon and Dragonite, which Mega Camerupt struggles tremendously against. Sample set: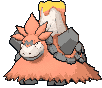
Click the following link to continue reading: |